
Now, back to our regularly scheduled programming. Above you can see my progress as of Sunday night on my Mawloc project. To explain how I got there, I'll step back a bit. In my update last week, I'd gotten a good bit of the basing done.

From that point, I first stuck the lowest of the arms emerging from the base. This required a bit of cutting and trimming, particularly for the one of the left.

I also added some putty at the wrist to raise the angle of the talon a bit. As you might be able to see in that picture, I also attached some additional pieces of cork with a paper clip as wire and then added putty, which will serve as a basis for a look of dirt showering down from the underside of each piece. The picture below shows these a bit better.

Next, I wasn't very happy with the gap I was still seeing between the dirt mound and the torso, so I added a gob of putty and squashed him down on the base to make sure the gap was filled. I will cover this in sand as well, and then, when the assembling the painted model, I'll probably go in with a thin bit of putty to close any gaps between the two sections of "dirt."

Next up was the head. I had come to the conclusion that trying to transport the whole thing assembled would be a bit of a nightmare. The weakest point would be either end of the tongue, both to the Mawloc's head and into the Marine's back. my first thought was to pin the Marine, but the tongue itself is too narrow for me to feel comfortable drilling into it. the other end however, presented possibilities. I started by drilling into the bottom of the tongue and then inserting a paper clip. It was a little wobbly so I used the paper clip to jam putty into the hole and ensure a tight fit. I left this alone to dry for about a day.
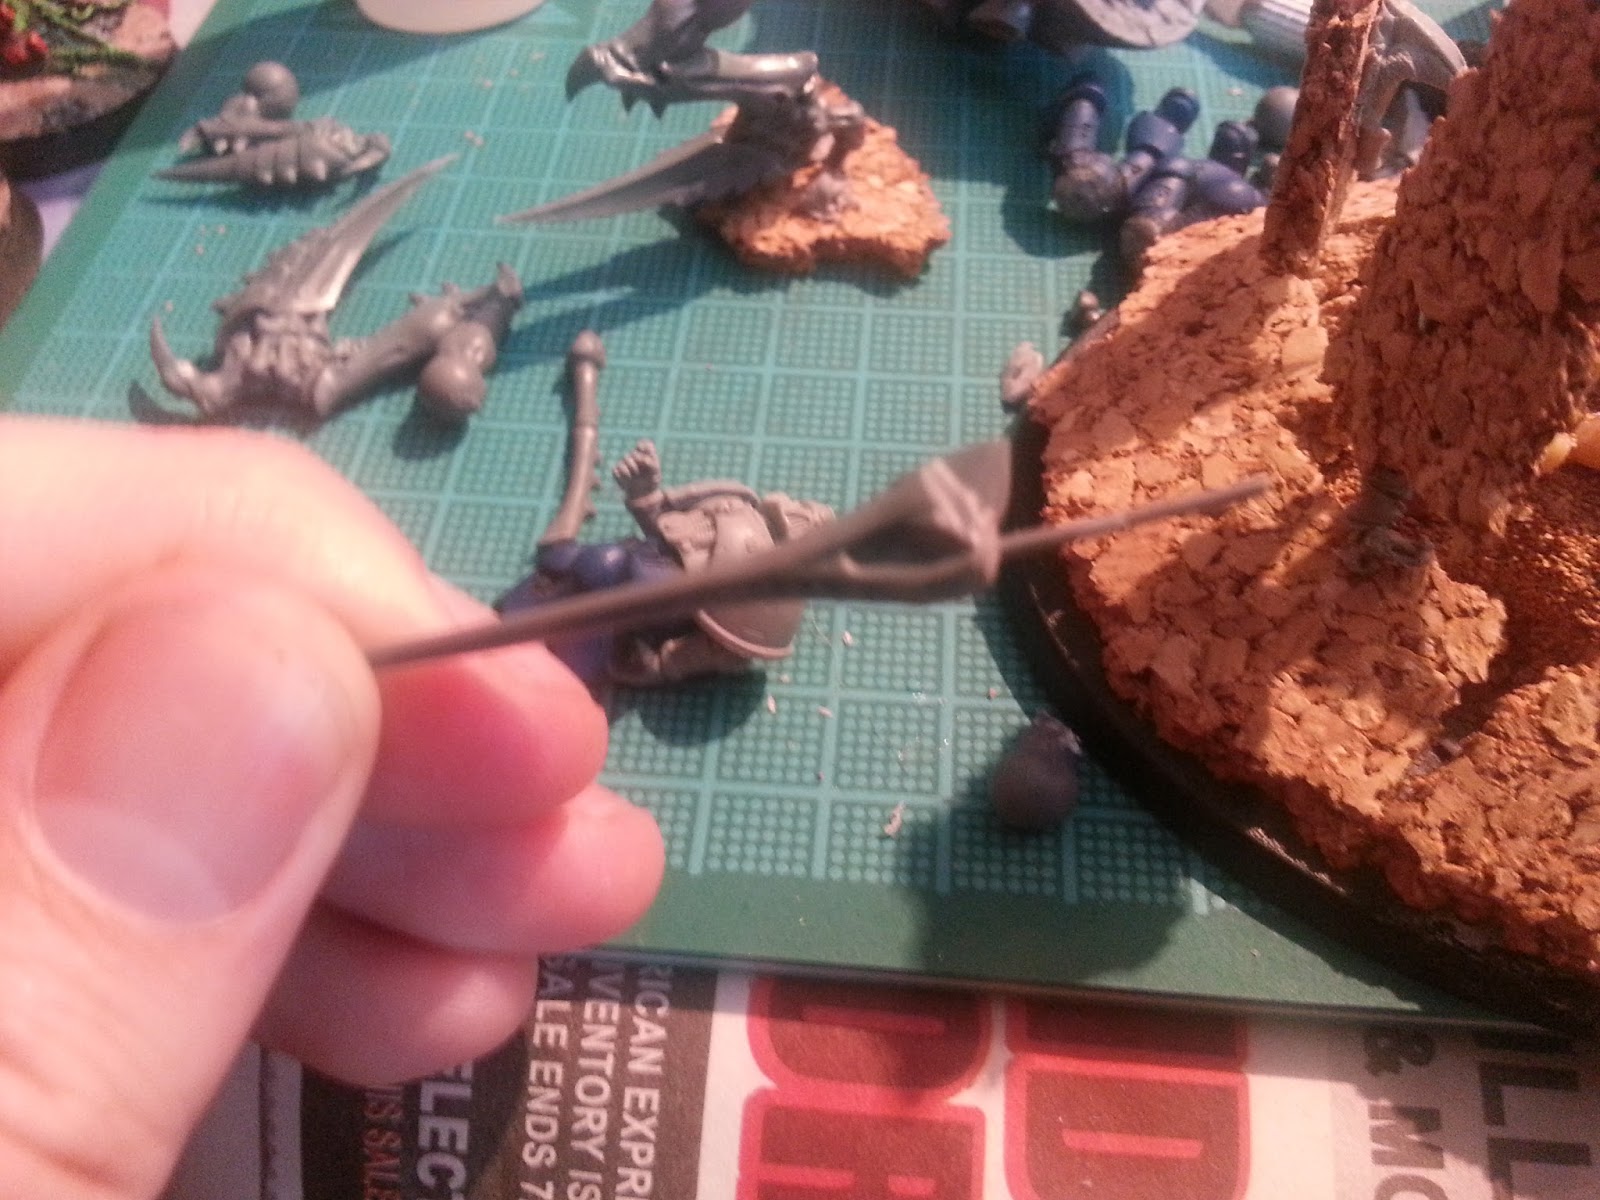
For the head, I had marked where the hole on the tongue was with a dry fit of a cut down pin, and then drilled into the spot. The plastic here was relatively thin and I soon had come through to the interior of the head. I once again jammed some putty into the hole with a paper clip to help lengthen the amount of support and then left this to dry.

Once the putty dried, I glued on sand onto the base again and then took it out to prime it.

I had decided I wanted at least one piece of the "pavement" to be in the process of being thrown. Initially I thought it might be good to have it coming off the back, but realized that would present a number of complications. Instead, I went for it to be on one of the upper talons.

 |
| The hapless victim |
 |
| Armorcast large flame gout for extra height and cinematic effect. |

I looked up some photos of flamethrowers in use to gauge what colors to use - how much white, how dark of an orange or red to go. I ended up seeing that right out of the nozzle was usually almost totally white, with the rest being yellow and some dark orange and then black spots. It was also interesting to see that the yellow to orange transitions were drastic; they didn't blend together much at all.

Starting from the white base coat, I then mixed Sunburst Yellow with white and did a drybrush of the model, going heavier away from the main line of flame and lighter the closer it got to the point of origin. I then did this again with a coat of straight Sunburst yellow.

Next was Blazing Orange. This is a very dark color, almost red, but like I said, the transition in the pictures I saw was very sharp. I did a light drybrush of this at the very tips of the flames, with more toward the end.

I don't have a picture of it, but I then went in and added a few spots of black. This can be seen in the picture, even in the heart of the flames.
With the flames done, I moved on to the base. I realized I had a problem with my concept - I wanted an asphalt road, with dirt bursting from below. However, on all my other models, the dirt of the planet they've invaded is grey. This wouldn't give me much contrast. To begin, I made a mix of Dawnstone Grey and black, which I drybrushed on the "pavement." This was then followed by a lighter drybrush of Dawnstone. I also did a heavy drybrush of Dawnstone on the "dirt" portions. Next I mixed Dawnstone and White to give my ultimate highlight. This was applied pretty liberally on the "dirt" to make the contrast sharper, and then very lightly on the edges and cracks of the pavement to call them out just a little.

According to my plans, it was done, but I wasn't happy with it. It was disappointing for the level of detail in the base. It needed something more, particularly something to sell it as a road. So, lane lines! I decided to do a double yellow lane line, and chose to put in crossing the sections that weren't exploding into the air, but overlapping, to create more interest in this part. I essentially picked where it would have initially crossed the base and started from the two end points, and then visualized where it would have been before the ground was pushed up. I painted the lines with Golden Yellow. Two coats was enough to make it solid, but still give a slightly faded impression.

I was really happy with it, but added some definition to the edges of each line with very thin edges of Sunburst Yellow and then Sunburst Yellow/Screaming Skull. It's still a little dark, but I figure the red of the Mawloc will pop really well out of it. With that in mind, I decided that unlike my recent models, I was going to leave almost no black on the carapace, but do the first layer of Khorne Red almost all the way to the edge of each plate.
After the Khorne Red, I added Mephiston red in fairly heavy lines about 50% up each plate. Unlike previous minis, I made a conscious effort to keep the divisions fairly sharp, keeping the lines distinct.

And that was it for this weekend. I have one more shade to go on the red carapace, then I will do the bright greens, followed by the black and teal for the skin. Depending on how it looks after the other two parts are complete, I will decide how much teal will go on the body. Then it will be on to the Marine. I'm on the fence about what chapter to paint him, but leaning to Ultramarines. Once I paint him I'll assemble the model to get a good feel for it, and if I like Ultramarines I'll work on adding some OSL from the flamer.
Looking at my to-do list, I've knocked a couple things down, and accepted that I probably won't get to repainting some of my older models. As such, the list is looking a good bit more manageable, with really only about 20 models after the Mawloc to go. It won't let me field the most ideal of lists, but it should still be effective.
If I can power through the remaining models this week, it will leave me the weekend (when I'll have company) to work on a display board, which is marginally less dorky since it will involve some power tools. From there, anything I get to will add flexibility, but not be necessary if I run out of time.
Must Complete:
- Mawloc Project
- Pieces assembled and primed
- Paint 8 Devourer Termagants
- Paint/Repaint ~ 40 Termagants
- 34 Assembled
- 17 painted
- Repaint 16 (Stretch)
- Paint/Repaint ~ 20 Hormagaunts
Assembly- Paint 10 new
- Repaint 10 old (Stretch)
Paint 2 Zoanthropes- Paint 2 Biovores
- Display Board
- Model and Paint 1+ Mycetic Spore
- Doom of Malan'tai Conversion
- 4 Hive Guard
- 1 Zoanthrope
- 1 Biovore (repaint)
- 10+ Gargoyles
- Second Flyrant converted from 3rd Edition Hive Tyrant
- 2 Tyrant Guard
The one thing I haven't been able to do so far is play-test. I didn't get any takers on a game for yesterday, and didn't have time to hang out in the shop just to hope on a game. Oh well, will have to hope for some free time to play test once or twice, though with my army list being dictated a bit by what's painted, selection itself is less of a concern as just familiarizing myself with how the list works.
No comments:
Post a Comment